
I’ve been blogging since 2014, but I only became more active in writing articles last year, hoping to monetize it and get Google AdSense approval to run automated ads on my blog site.
I know a lot of bloggers are having a hard time getting Google AdSense approval. I also know how it feels to get rejected every time you apply. It’s frustrating and exhausting at the same time.
I even gave up and decided to sell my domain names on GoDaddy for auction.
Though there are a lot of ways to earn from your blog or website, and though there can be an alternative to Google AdSense, we all know that Google AdSense is still the best option when it comes to blog monetization.
Fortunately, after months of trying, I finally got AdSense approval last month and am now running ads on my blog. I still can’t believe I finally made it. I still can’t believe my application was accepted.
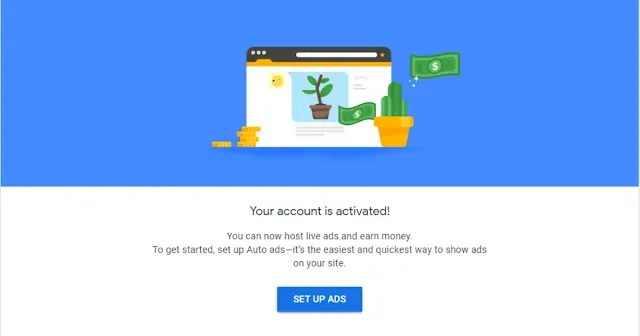
When I saw that “Your account is activated” message on my Google AdSense account, I really did break down in tears. Nothing can contain my happiness at that moment. It’s a big prize for someone who has burned countless midnight oil.
Finally, my efforts will pay off.
Top 15 Google AdSense Approval Tips
You, too, can get your blog approved for Google AdSense. Here are the top 15 tips you can do on your blog to ensure you get Google AdSense approval quickly.
1. Publish at least 15 Blog posts
When I applied to Google AdSense, I only had 15 blog posts. Thus, I suggest you also publish at least 15 posts on your blog before applying.
I don’t really know the exact number of posts required by Google AdSense, but most bloggers suggest at least 30 posts on your blog. If you can publish over 15 blog posts, then it’s better.
2. Write a post with at least 800 words
One way to show Google AdSense that you’re serious about your content is by writing at least 800 words per post or article.
Some bloggers suggest at least 500-600 words. But with mine, I made sure my posts or articles would run from 800-1000 words.
3. Add contact us, privacy policy, and about us pages
These pages seem unnecessary to be on your blog but they are actually important to get Adsense approval. More than that, your transparency will build your site’s credibility and eventually gain your reader’s trust.
4. Customize the design of your blog
Apart from the blog name, your blog design is an important factor in keeping your readers coming back. Your blog design is what they will actually notice first.
Make sure to have a user-friendly, easy-to-navigate, and welcoming blog design to encourage them to engage more with your content and page.
You may check our dedicated blog post on how to start a blog for free which is just perfect for beginners.
5. List your blog on Google and other search engines
Increase your blog or website’s presence by listing it with Google and other search engines like Bing, Yandex, and AOL. If you’re using the Blogger platform, you can immediately list your blog on Google by going to the basic settings.
6. Get a custom domain name
I do see some monetized blogs or websites still using the Blogspot subdomain. I even tried it myself – getting blogs with blogspot extension getting approved for auto-ads with Google Adsense, yet, the clicks are only minimal and the earnings won’t even budge.
Getting a custom domain name would be a great choice if you want to rank your blog fast. It would help you get your blog approved immediately by AdSense and would also help your blog to look professional.
The best part, it is easier to earn with a custom domain name, based on my experience.
Though I have yet to experiment with using the Blogspot extension. It means creating a new blog using the subdomain blogspot.com and trying to get it approved in Google AdSense.
7. Get a professional email address
Increase your chances of getting Google AdSense approval by getting a custom email address. An email address with the @gmail.com extension looks okay. Yet, if you want faster approval, I suggest you get a professional email address.
8. Don’t create multiple Google AdSense accounts
You could have numerous Google accounts, but you can’t have 2 or more Google AdSense accounts. You need to close other accounts; otherwise, your AdSense application won’t be approved.
9. Submit a sitemap
Most bloggers do not mention a sitemap, but I happened to encounter this one as I design my blog.
A sitemap is where you give data about your pages, recordings, and different documents on your site, and the connections between them. It reveals to Google which pages or records you believe are significant on your site.
You could further understand the sitemap by going to Google Search Console and creating an account.
10. Get your blog pages indexed
Together with your blog posts, you need to index all available pages on your site on Google Search Console. Indexing all your URLs will help Google to see all your posts and pages and make them available on search engines.
11. Write original articles and use copyright-free images and videos
Avoid merely copying and pasting other websites’ posts, images, and videos to avoid plagiarism and copyright infringement. Create your own content if possible. If you need to use photos of other businesses, ask permission or give credit where credit is due.
12. Add meta tags
Meta tags, also known as meta descriptions, are basically minimal substance descriptors that tell search engines what your blog or website is about. They don’t literally show up on your blog’s platform, but they show up on search results.
13. Add Google Analytics to your blog
Google Analytics is important to see how your visitors interact with your blog. Get your Google Analytics ID and add it to your blog to start tracking. By doing this, you would know the things to be enhanced on your blog by checking what your visitors need.
14. Add Google AdSense code to your blog
Once you apply for Google AdSense monetization, you will be asked to add a code to your blog. This code needs to be added to the source code section of your site. You simply have to follow the instructions provided, as it is easy.
If you are confused in this area, you may ask for help from your site administrator, web developer, or someone who knows HTML or understands the web language.
15. Add the ads.txt code to your site
Once you are approved to run Google AdSense auto-ads, you may need to add the ads.txt code to your site if it has not been added yet. You need this to successfully run ads on your site, aside from the Google AdSense code. You simply have to follow the instructions provided by Google AdSense.
If you have questions we have not covered above, feel free to use the comment sections below.